Laman

Saturday, June 28, 2014

Barney is a T-Rex!


Barney is a T-Rex! That profound paleontological insight struck me just recently.
I'd had a flurry of interest in Barney cookie cutters. (And by a flurry I mean 3 people. But that's unprecedented!). I don't have Barney cutters. But then I looked at the T-Rex cutter and that's when I saw Barney, and his true nature became clear to me.  Fascinating, huh? Huh?

Anyway... Although I don't like doing character cookies, and I consider myself fortunate having avoided the big B-Rex so far, I just had to give him a try. I only made 2, thankfully. So my sanity remains reasonably in tact. All things being relative.


Sketch on the outline with a graphite (non-toxic) pencil or with an edible marker


Use piping consistency black icing and a fine nozzle (Ateco 00 or PME 1.5) to pipe on the outline.
Leave to dry.


Pipe on the stripes of white icing for Barney's distinctive smile (that impossibly toothless toothy grin).
Leave to dry.


Outline and flood his body with purple  - remember to leave his tummy out, it's going to be green.
While the body is still wet, pipe the green dots on his back and tail.
Allow to dry.


Flood the green belly area.


Pipe on an eye, and a nostril.
And a few yellow spots for toes.

Once the eye is dry, a purple arch above the eye helps complete the face.


Air dry for 24 hours before packaging.

Maybe not a "dinosaur sensation", but he'll do.

And that's my Barney tale. 


; )

xxM

Friday, June 27, 2014

maleficent

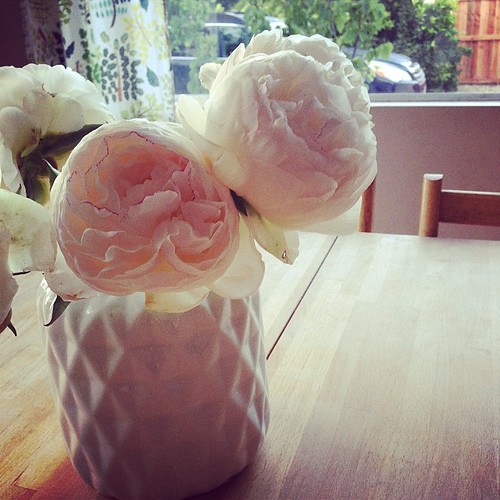
Peonies.
totally unrelated picture of peonies


Ken and I took the kids to see Maleficent last night at our little local movie theater and you guys, it was so fun.  I was really surprised by how much we all four enjoyed it.  Our expectations were low--the previews made it look so dark and scary--but it was actually sweet on many levels and there were fairies and magical folk, and we always like that sort of thing.  I'm not a big Angelina Jolie fan, but she was not bugging me at all in this.  I was able to forget that she is "Angelina Jolie" and just get lost in the movie--so I guess she did her job.  And Elle Fanning was adorable. 

To tell you the truth, we live in a very small town and we rarely patronize our local movie theater--mostly because we don't really have a babysitter locally.  We end up going to the big multi-plex in Oxnard.  But lately I've been thinking about "voting with our dollars" and it's important to me that our local theater continues to stay in business, so we decided to see Maleficent in town last night.  And when we got there I was so pleased with the "feel" of the experience.  The theater is just so small and cute and we always see people we know (small town thing).  I was charmed by the snack bar--again, small and "local" feeling.  I think we are going to make more of an effort to see movies locally when we can.

Other ways I am "voting with my dollars"--I also shop quite a bit at our local market, which just changed ownership--and I basically refuse to go to a large supermarket like Vons and Ralph's (ugh--hate those places so much!).  (To be fair, we do do a large shop-up at Trader Joe's once a week as well, but are constantly running out to the local store for everythiing else and last minute stuff).

Do you like to shop locally?  Also, what did you think about Maleficent??

Paper Cut Banners


A few weeks ago, I had a go at creating some paper cut postcards as alternatives to cards and I have an extension of that, but slightly more simplified as party decorations – paper cut banners.  If you have seen this post, or this, you may know that I am preparing for my Dad’s big 6-0 and have been making a few party accessories that I can take away with us to decorate where we are staying.  This DIY can be made as simple or detailed as you like, but I decided to use the same glitter card for the impact and simple shapes of the postcards for this project: 
The glitter card I used was pre-cut [in a pack described at ‘scrap’] in roughly A6 size.  These were the perfect size for a garland, so I marked the bottoms and cut them away to create banners:
For the cut-out designs, I used the same technique as the postcards, printing out a template, [or you can create your own] and drawing around the outlines in pencil.  Facing the template down on to the back of the glitter card, I then scribbled over the lines to transfer the image in reverse:
I used a craft knife to cut the image [if you are unsure of how accurately you may do this, don’t cut all the way through the card at first, this will create an impression in the card and allow you to go over, pressing harder once you have the line you want to cut the card]:
Once the shapes are removed, you are good to go.  I kept my designs simple, but you can create designs as detailed as you wish – that’s next on my list.  Finally, to hang my banner, I threaded a
needle with cotton and made a running stitch through the top of each flag:
...ready to hang:
Have a fantastic weekend - I'm off on holiday next week, so will see you on the other side x
see you next time x

Thursday, June 26, 2014

beach day

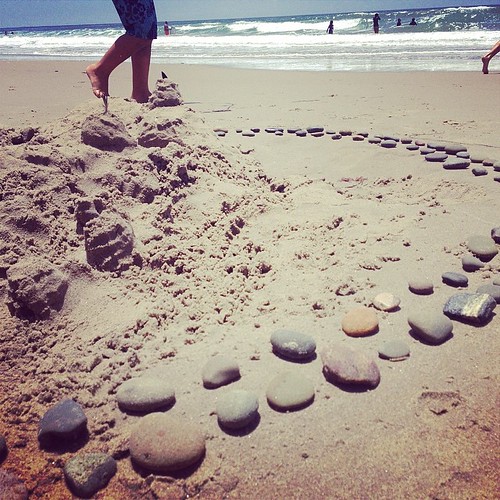
Working on a castle. Carpinteria. Carpinteria.

I'm not quite ready to give up my blog.  I've been struggling with posting.  I want to give this one last try by really simplifying things here.  I'm going to limit myself to posting only 1-3 photos per post.  That in itself is a big relief.  And I'm going to just post random stuff.  What appeals to me about continuing the blog is the journal aspect of it.  I love the memories and family photos.  My blog is the closest I have to a family album.  I hate to give up the documenting of all of that. 

We are on summer break now.  The first week we spent in Palm Springs--we had the funnest vacation--Ken and I and the two little boys.  I love a true "resort" type vacation.  Maybe I'll blog about it tomorrow (posting only 1-3 photos!  LOL).  Now were are back and settling into summer.  It's actually a harder transition than one might expect.  I thrive so well with structure and a schedule.  I love my ordinary day of commuting, working, coming home and making dinner, having pizza on Tuesdays.  I'm sort of at loose ends without that.  But yesterday was a better day and maybe I'm starting to hit my stride.  I took the boys to the beach in Carpinteria.  I kept the outing so simple and it turned out to be a great afternoon.  The boys were so good and barely fought and they even carried all our stuff down to the beach for me.  Dieter loves to jump in the waves and sit and think.  Rainer likes the waves too and he spent a long time working on a big sand castle complex.  I gathered rocks for him and placed them around the castle, which was awesome.  I love the sound of the waves so much and I love getting out of my head a little bit while being there. 

Also of note, I'm getting so so much better at driving the "mountain route" to Carpinteria, which is making me very happy.  I used to stick to the main highways, but I'm finding I love taking the mountain pass.  I like to take the curvy roads pretty conservatively, and yesterday I had plenty of practice with pulling over to let cars pass me. 

I'm thinking I want to take the boys to the beach twice a week in summer.  It's good for my soul.  We got a tiny bit sunburned yesterday (mostly me) so I'm vowing to be more careful re. sunscreen in the future.

I'm off to yoga right now--also a healthy summer thing. 

Wednesday, June 25, 2014

Lemon Macarons

Are you ready for some more of my imperfect macarons?
These were even less pretty than the previous batch. I'd under-mixed the batter slightly. Probably folded it 33 times instead of 34... Ugh, fussy things.
So, most of the macaron shells had little nipples (sorry, this post has a PG16 rating!).
The perfectionist in me wanted to toss them and start again, but I didn't have time. And in the end, filled with home-made lemon curd and sprinkled with poppy seeds, they were still pretty - pretty tasty : )


Lemon Macarons 

3 egg whites (100g-110g), at room temp. Aged for 2-3 days.
2 Tbs caster sugar
200g icing sugar
125g ground almonds/ almond meal
1/2 tsp cream of tartar
A few drops of lemon extract
Yellow gel/ powder food colour
Poppy seeds for sprinkling

Prepare baking trays with parchment. Make sure that the parchment is flat and that the trays aren't warped.

Put the almond meal and icing sugar into a food processor and pulse until well mixed and finely ground.  
Sift into a bowl. Discard the large granules which don't pass through the sieve.

Whisk the egg whites at low speed with an electric beater until frothy, then add the cream of tartar and caster sugar.
Beat until soft peaks form, then add the lemon extract and gel colour.
Beat at high speed until stiff peaks form. 


Sift the almond meal / icing sugar mix into the meringue in two batches  - folding in between. (Fold about 10 times after each addition.)
Once again discard any large granules of almond meal.

Use a spatula  to gently fold the batter until it is loosened and falls in "ribbons" from the spatula (about another 10 folds). 

Transfer to an icing bag with the tip cut off or one fitted with a large plain round icing nozzle (not more than 1cm diameter).

Pipe small dots of batter beneath the corners of the baking parchment , to keep it in place on the baking tray.

Pipe your macaron rounds - about 3-4cm diameter, about 2cm apart. Pull your piping tip to the side - this leaves a tiny tail, which should settle. 
Rap the tray twice on the counter to release any hidden air bubbles. 
Sprinkle poppy seeds over the rounds.

Turn on the oven preheat to 150'C

Leave the macarons to stand for 15-30minutes until they form a "skin" - ie. when touched with a clean, dry finger they aren't sticky.

Bake at 150'C for 15-20 minutes.
Check that they're not browning as the end of the baking time approaches.
Remove from the oven.

Leave to cool for 5 - 10minutes, then remove from the trays. If they are undercooked, they will stick to the parchment. You can pop them back into the warm oven for a few more minutes just to dry out a little more.
(Macarons are best after being filled and left for 24hrs - the filling rehydrates them a bit.) 


Lemon Curd

5 egg yolks
1 cup sugar
Zest of 3 lemons
75 ml lemon juice
115g butter, cut into cubes (about 16) 


Whisk together egg yolks and sugar until smooth.
Add the lemon juice and zest. Mix well. 
Place the bowl on top of the pot of gently simmering water. 
Whisk until mixture starts to thicken.  It should "coat the back of a spoon". 
Pour the mixture through a sieve into another bowl  to remove the zest. 
Add the butter a cube at a time, allowing it to melt before adding the next. Mix well. 
Store with a layer of cling-wrap directly on the surface of the curd. Refrigerate. 

When the lemon curd has set, pipe it between pairs of macaroon shells. 

Refrigerate the filled macarons, but allow to come to room temperature before serving. 


So, when life gives you lemons...

;)

xxM 

Bodyline Review: Shoes 224

Last Thursday I received a pair of black Bodyline boots in the post. They took a few weeks to arrive as I used AIR shipping, but I didn't mind-- there was a free shipping deal going on and I had to take advantage of it! I didn't get hit with customs which was another bonus.

Bodyline shipped them in a bag, but this was fine because they were very securely wrapped in layers of bubble wrap. The boots were stuffed with long, stiff foamy stuff to help them retain their shape, and the toes of the boots had balled up tissue paper as well. The boots came with zero damage whatsoever. Thanks, Bodyline!

Well, here's the outer side of the left boot. You can see where the ankle creases due to movement. I don't mind this too much, and it's inevitable with sturdy, non-leather materials. The boots make your feet look really tiny!

Here's the inner side. The zip isn't the smoothest to do up but it's manageable. The creasing only seems to affect the outside of the boot, but this will probably vary depending on what your walk is like.

The traction is pretty good. The soles feel hard yet slightly rubbery, and they are rough to the touch. It seems unlikely you would slip over in these, unless you were on ice or something! I plan to wear the boots on wet or cold days rather than snowy conditions anyway (not that where I live has seen snow any time recently).

And here's a front view of the boots worn! I really like the bows as they are well constructed and cute, though none of them are detachable which might bother some people. These boots do not have a very forgiving calf size. My calves are about 37cm around, and I really think that is the maximum size for these boots. Otherwise, the laces won't be long enough and the sides of the boots won't really meet the tongue. It's a shame they didn't make these boots larger to fit more people.

Overall, I really like these boots. However, they lose points for their general solidness, which I can imagine could get uncomfortable if worn for an extended period of time. Also, these boots run a touch small. I would recommend getting 0.5cm size up from your regular measurement if you plan on wearing socks with these. I will only be wearing regular tights with them so hopefully they will remain comfortable. To explain, my feet are something like ~24-24.2 cm (I find them so hard to measure) so I always get size 245 in Bodyline shoes. For these boots, I think 250 would have been right for me. 

Finally, I have a pair of lolita boots! I will update you on their comfort level once I've worn them for a day.

EDIT 30/1/15: These boots are incredibly uncomfortable for tasks such as simply walking down stairs!  The material is so tough that it isn't flexible enough to accommodate the bending involved in that basic process, Where the tongue meets the top of the toe is quite bulky and you have to cares readjust this to avoid it digging into your foot. I cannot in good faith recommend these boots for anything more than a photoshoot, They are simply not soft enough for extended wear.

I hope this review was helpful. Let me know what you think in the comments 

Eton Mess Meringue | Profiteroles

My favourite sporting time of year is here again: Wimbledon.  This can only mean [in no particular order] Murray, Nadal, Meringue, Pimms, Strawberries and Cream.  Last year, I used Wimbledon as the excuse to eat some form of meringue everyday as I’m pretty sure those are the rules of being a spectator, so I have two versions of Eton mess treats to share today, should you need more variety in your meringue consumption.  


So very welcome.  

First up, Eton Mess Profiteroles.  sortedfood.com are to blame in teaching me how easy these are to make and I first had a go just over a year ago, which you can read about and see a more detailed method description here

The difference was in the filling, which consisted of whipping cream, diced strawberries, diced raspberries and crushed meringue all whisked together until a firm consistency and bright pink. 
[P.S – as the strawberries and raspberries are full of water, try and remove as much excess with a paper towel as possible and whip most of the cream before adding them to prevent the filling being too runny].
With a large nozzle [large enough for the diced fruit to go through] placed in the cut corner of a sandwich bag [l’ve been trying this as opposed to piping bags and it really is as easy as they say] I filled each profiterole with the mixture:
Once completed, I topped each with a spoonful of melted white chocolate and left to set in the fridge before serving:
If I’d been thinking a little more of the presentation, I’d have crushed a bit of meringue in the white chocolate before it set, or a few freeze-dried strawberries….guess I’ll have to make them again.
Yes, this is all for one person.
 

Next, a slightly different take on Eton Mess that gave me an excuse to try and fail at piping meringue cones.  There were only two of us for dinner on Monday, so I used 1 egg and 40g caster sugar, which gave me enough mixture to attempt my piping four times – turns out you can try and fail four times easily, but hopefully this will give you the idea of what I was trying to do………….made as an upside down nest, I started by creating an outline circle and then continued piping on top, bringing the circles in to the middle with each round until I reached the top:
I went for two tone, adding a few drops of gel food colouring in to the mix as I transferred it from the bowl to the bag.
They stayed straight pretty well until I put them in the oven where they tilted, collapsed and looked so sorry for themselves that I considered giving up and just eating them, but in all honesty, they were only going to be smashed in the end, so I carried on like the soldier I am and filled the ‘cones’ with the eton mess mixture:
Seriously. The 'cone' on the top right.  Hot mess.
To keep the mixture in, I topped with melted white chocolate, covering the base and left to set in the fridge:
To serve, I filled ramekins [thank goodness for Gu puddings] with chopped strawberries and raspberries and then added the meringue 'cones’ to the top:
That’ll do, Pig. That’ll do.
So there you have it, two more excuses to east Eton Mess during the next week and a bit.
see you next time x

More Wimbledon-related food attempts:
Fruit-flavoured Meringue
Eton Mess
Trifle
Mini Strawberry Pavlova
Strawberry Mousse
Lemon Pudding
Pimms Sorbet

P.S If you’re not one for fruit and veg floating in your Pimms, can I suggest these Pimms skewers instead?