Laman

Tuesday, March 17, 2015

Oreo Bites


They say that necessity is the mother of invention.
I don't know who they are, but they're right.
I needed butter to bake something for tea for the next day's class. I didn't have butter. (How could I not have butter!?!) But I did have ganache. Go figure!
So, I "invented" these.
Who knows if they're original.
They say there's nothing new under the sun. (I think they're wrong on that one.)

 But here they are - a tea treat that doesn't need butter...
I'm calling them Oreo Bites.
 Or Oreo Bombs. Maybe Oreo Pops.
 Um... Oreo Thingy's - that one was Tammy's title; giving credit where it's due  ;o)


Oreo Bites / Bombs/ Pops
Recipe by Tea,Cake and Create

300g Oreo biscuits, finely crushed
200g white chocolate ganache
200g dark chocolate, melted - for dipping.
Cocoa for dusting


White Chocolate Ganache

150g white chocolate
50g cream (35-40% fat content)

Melt both ingredients together in a double boiler.

Allow to cool slightly.

(If you're using ganache that has already set, heat it gently - either in the microwave or double boiler - until it is at spreading consistency.)


Assembling the Oreo Pops:
Mix the crumbs and ganache together.
Take spoonfuls of the mixture and roll into balls.
Refrigerate for 30minutes

Dip in melted chocolate. (I do this by dipping half, allowing it to set; then dipping the other half).

Dust with cocoa powder. Serve. Eat.

xxM


Monday, March 16, 2015

How to Make Nail Varnish Eggs


Two completely different decorating effects achieved with the same product [and one of my favourite] - nail varnish.  I tried a decorative plastic egg makeover last year [glitter involved, of course] but wanted to try some other effects, in particular marbling, which is finding its way into everything at the moment.

What I Used:
Plastic Decorative Eggs [£1 in the sale now!]
Nail Varnish
Pin / Bowl / Water / Blu-tac

 For both the decorations, I used pins to help me prevent nail varnish getting
 all over my surfaces, hands and soft furnishings, piercing one end:
 To create the marble effect, I decided to do the opposite of my usual approach to DIYs and
not attempt to many effects and colours at once and start simply [maybe trying this again with
a few more colours now I feel I know what to do].  I picked my favourite shade of nail varnish
 and added a few drops to a half-full bowl of water.
The nail varnish creates a thin film that sits on the top of the water:
 Taking one of the eggs, I plunged this in to the water, turning the egg to wrap the
nail varnish around the plastic:
 Stand the pin in a small pinch of blu-tac to dry:
 I tried the technique a further couple of times, each time creating a slightly different effect:
 Once completely dry, you can further create a smooth effect to the nail varnish with a coating of clear varnish or spray craft varnish.
For the second effect [and after a complete change of the light], I tried a feather pattern.
It's a really simple technique, applying short strokes of colour around the egg.  It doesn't require
 any structure or particular pattern and the more random your strokes, the better.  Stand your pins
in blu-tac to help keep the eggs steady.  With my first colour choice, I completed a full cover:
...before moving to the next:

...and then continuing this with more colours, just in time for the sun to come out and help
 quicken the drying time:
...and those are two quick and easy nail varnish decorating techniques you could use for your
Easter decorating this year [or any small upcycle/decorating project]:
see you next time x

More Easter projects can be found here.
...and if you are a nail varnish craft convert? Try this too!

Sunday, March 15, 2015

mid-march check in

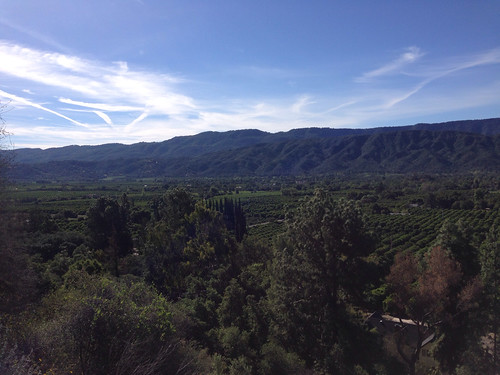
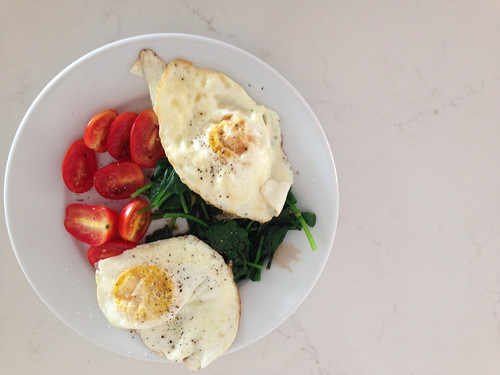
View from my hike My new breakfast Orange blossoms in full bloom right now

March is half over now. It feels more like summer here these last few days, rather than technically still winter. Oh my. Winters lately in Southern California.  To tell  you the truth, I'm feeling pretty anxious about the lack of rain, the record drought conditions, and the ever hotter winters.  I'm not sure what else to say about that. I hope that human beings adapt to this new climate . . .

Good things that have been happening in March--my walks are getting more regular and I'm liking them more.  This is a good sign.  I'll refrain from getting overly optimistic too soon.  I think having a hill to walk up gives me enough challenge and novelty that it feels new and fresh to me--not my usual super boring walk around the block.  And on Saturdays (two weeks in a row now) I've been going to the top of my normal hill and then entering the trailhead at the top and doing the entire loop.  I call it a hike, but I think most would call it more of a walk.  Anyway, it is beautiful and the views from the top are sweeping (see photo 1).  It takes me an hour and a half to do the full loop.  It's exciting to have this.

I've been listening to a new podcast-- Happier with Gretchen Rubin.  You know I like her blog and books, right?  The podcast is in its infancy, but it's pretty fun.  Her sister is her co-host.  Her sister is located in Southern California and she also commented on a local hiking trail she has been enjoying and that what passes for "hiking" in So Cal would most likely be known as "walking" everywhere else.  It made me smile for sure!  What podcasts are you listening to lately?  I hear Invisibilia is worth checking out.  I listened to one episode (the one they aired on This American Life) but I need to download more episodes and give it a fair chance.  How about you?

In other news, I have a new breakfast (photo #2).  Faith sent me a picture of her breakfast one morning this week, and I was fully inspired.  Hers was eggs, avocado, and tomatoes.  I subbed spinach for the avo and have been having it ever since.  I think it's making me healthier already!  ;)

Also--the orange blossoms are fully in bloom and they are fragrant and lovely.  I love this time of year--so expectant and hopeful.  I love making plans for summer and the longer evenings (after the sleep deprivation is over).

I did a bit of a closet cleanup today and am heading to Buffalo Exchange tomorrow after work to sell some stuff.  I'm continuing my goal to transition to a capsule wardrobe.  I feel like I'm making some good self discoveries in the process (e.g. buy less and don't expect to like it forever, so adjust your spending accordingly.  I think I've mentioned Jennifer L. Scott's YouTube videos before, yes?  She is very helpful in this process).

Thank you so much for the comments you have been leaving!  I haven't been getting e-mail notifications lately (not sure why), but discovered today comments I hadn't seen before.  Thanks again!  How is your March going?

Friday, March 13, 2015

Spotlight - Blossoms and Bakes, Hillcrest

For a while now I've been mulling over how best to promote and bring to peoples' attention the talented ladies I've encountered through my classes. I wanted it to be more substantial than just sharing their pages on Facebook.  And I personally love to know about people. (It's called being interested,  not nosiness, ok?!)

So, herewith the first of what I hope is going to be a monthly feature of interviews with local bakers, decorators and associated business owners.

Let's all say Hi to....

 Blossoms and Bakes, Fancis Bothwell


Tell us a little about yourself / your background.


My name is Francis Bothwell.  I grew up in the Netherlands and after finishing fashion school where I had a great outlet to be creative and learn about photography, styling and graphic design, I travelled the world.
I have since settled in Hillcrest South Africa with my husband* and our 5 year old son.
(*Editor's note - Fran's husband helps me out whenever I've got my self in too deep with my Mac. He's an Apple expert... Mac Access)


How did you get into baking / decorating?


 I always loved baking, as a young girl I loved to bake with my Mom.
But missing home and craving Dutch treats I started baking biscuits and cakes for myself, family and friends.They where such a hit that I kept getting orders and when I saw some iced biscuits in a local deli I knew this is what I wanted to do.

What do you like making / decorating the most and why? 
Anything you steer clear of? 
 I don’t really have a favourite as I prefer challenging myself and trying out new recipes.
 I don’t really steer clear from anything. And if it’s believed a recipe is hard, it makes me 
 want to try it even more.

What are your biggest baking / decorating challenges?  
Have you had any memorable disasters? 
 It is really important to me to use natural and good quality ingredients. As I use only 
 natural colouring it can be very challenging to get the right colours for icing and fondant.
 I remember trying to make black icing and started off with way to much icing to colour black 
 and ended with a huge bag of grey icing!
      

What's are you most proud of so far? 
 It is not necessarily a product but the fact that I have not given up yet and still challenging
 myself to try new things.


What would you say your style is, or is there a particular style you like to follow? 
 I would say my style is organic and simple, drawn to more natural colours and materials.
 Donna Hay for example, her style I enjoy.

Where would you like to go with your craft? 
My short term goal at the moment is to learn as much as I can and develop my personal style.
Long term it would be fantastic to be able to bake and style for magazines and maybe even start my own blog.
   
Any words for the decorating community? 
Don’t be discouraged if a recipe doesn’t work out. Don’t give up, research and keep trying, and don’t loose sight of what inspired you to bake, have fun with it!


..................................
---------------


Aren't Fran's photo's great?! It was seeing her pictures on her FB page, that really spurred me into action to get these interviews started.
So, go over, see for yourself and show her some love at Blossoms and Bakes.

Until next time...

xxM

How to Make Crepe Paper Flowers

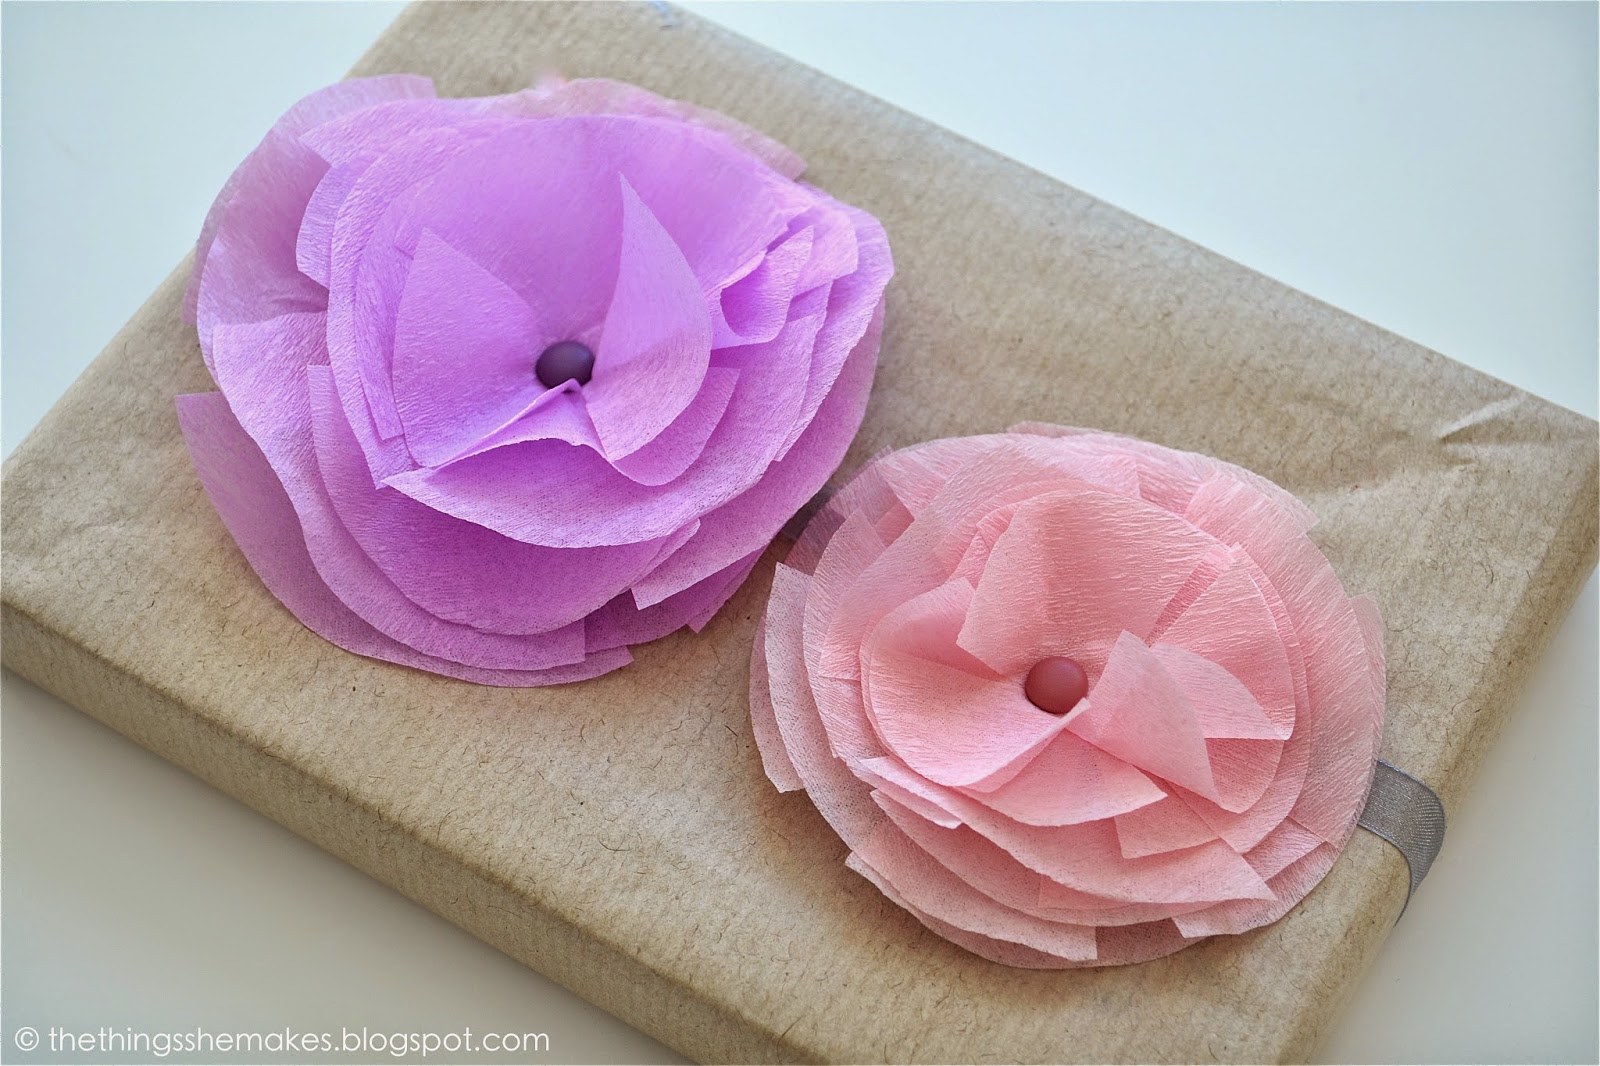
Looking for a way to wrap p your presents or to create a card embellishment - today's crepe paper flower DIY is easy and can be whipped up for any last minute preparations.


What I Used:
Crepe Paper
Brad
Scissors
Round Template

These embellishments can be adapted to any size you need, so grab something [a cookie cutter, 
plate, coaster etc.] round that you can use as your template.  I folded my crepe paper so that there
 were 9 layers of paper, however; the more layers you have, the fuller you flower will be.  
Using your template, cut your round:
To create the simple flower shape, cut three triangles into the round, leaving around a 1cm centre
 and not worrying too much about being neat, or creating triangles at equal points:
I removed 4 layers from the round and put these to one side.  
To the remaining 8 layers, I trimmed the circle by around 1 cm:
Then, removing a further 4 layers and putting these to one side, I trimmed the final 4 layers
 by another 1cm.  This is a simple and easy way to create three different sizes:
Next, to give the petals shape and texture, use a round pen or handle to mould your paper in to shape [the heat from your hands will help, but be careful not to rip your paper]:
Once you have shaped all your petals, begin layering them:
For the last few petals, I used a smaller handle to define the petal curves further:
To fix all the layers together quickly and easily, I used a coloured brad, piercing it through the centre:
Your embellishment is now ready to use for gift wrapping, cards, tags or any other paper craft.
Simple and easy, try different colours, sizes or number of layers:

 Have a great weekend!

see you next time x

More wrapping ideas? Step right this way:


Find all our wrapping ideas here.

Wednesday, March 11, 2015

How to Make a Hammered Fimo Bowl


I love a jewellery display dish and I love a bit of gold [you probably haven't noticed].
I had an experiment with Fimo and create a two colour dish last year and was keen to try it out
 again, learning from my shaping mistakes and wanting to put them right!

What I Used:Gold tone Fimo
Rolling Pin / Cookie Cutter
Bowl / Paintbrush / Baking Paper


For my ring dishes, I divided the Fimo into 2 and rolled the modelling clay on top of baking paper [this prevents it sticking to the surface you are working on and makes it easier to move about and work with] into a round, approximately 1/2cm thick:
To create the hammered effects I wanted to achieve with the dishes, I tried two effects
[both using the end of a paintbrush, but any tool, with any shape, that will leave an impression in your Fimo will work]:

The first effect was completely random, an all-covering punch of the paintbrush over the Fimo [perfect stress-buster]:
To create the dish, I then used a cookie cutter and removed the excess:
The second effect was more structured and uniform in design, punching the Fimo with the
paintbrush so that the circles were impressed in lines:
Once both dishes were cut, I transferred them from the baking paper into a bowl to mould them easily and provide a shallow curve to their shape
[this is where the baking paper helps to transfer without them sticking]:
After both dishes were shaped, I transferred them on to a bking tray and popped them in the over at 160 for 20 minutes [or until hardened]:
If you find your Fimo looses shape at all during the bake, remove from the oven and place straight back in to the bowl you used to shape your dishes with - gently press against the sides and you will find it will bend back into shape whilst still hot [be careful!]

Leave your dishes to cool fully before using to display your prettiest jewellery and trinkets:
see you next time x